

Tutorials
How to Photograph Nails With Just Your Phone: A Guide for Nail Techs
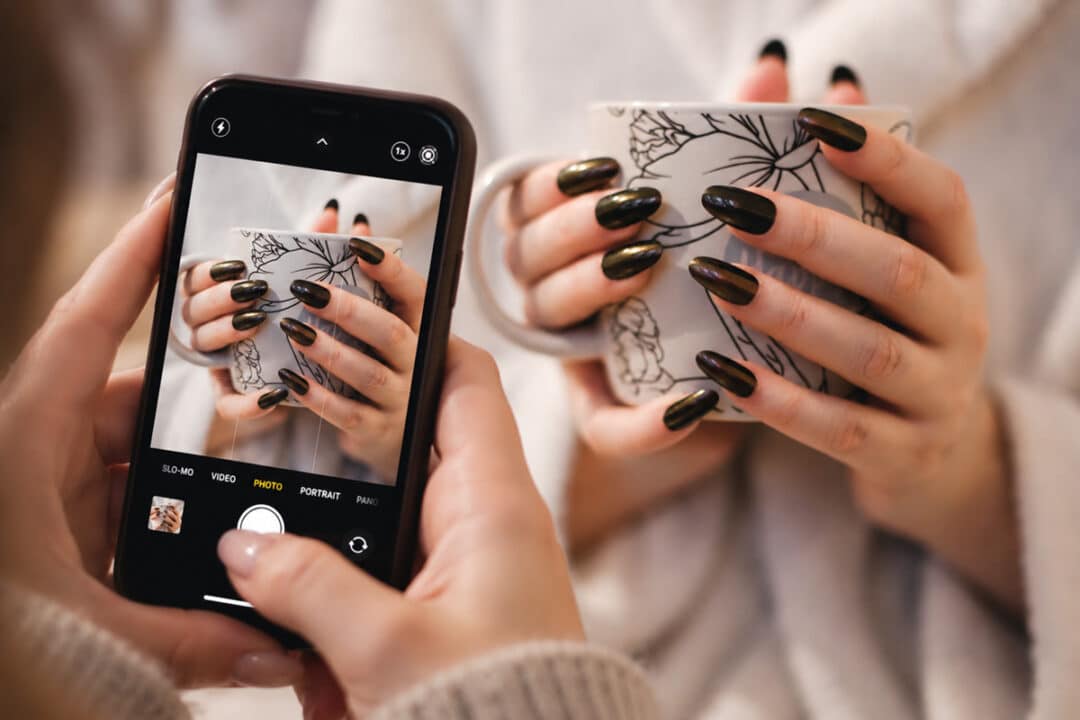
Your Instagram is your shopfront. Before a new client ever messages you, they’ve scrolled your feed and made a judgement about your work in about three seconds. Here’s the uncomfortable truth: mediocre photos of brilliant nails lose to brilliant photos of mediocre nails, every single time.
The good news? You don’t need a camera, a ring light, or an editing degree. The phone in your pocket is more than capable. Great nail photography doesn’t need expensive gear. What you need is a simple, repeatable system that takes only a couple of minutes per client, plus about 15 minutes once a week. That’s exactly what this guide gives you.
1. Light is everything (and the best light is free)
Lighting does most of the heavy lifting in a great nail photo, and the best source is often a window.
- Shoot facing a window with indirect natural light. Avoid strong direct sunlight, which can blow out shine, exaggerate reflections and create harsh shadows.
- Turn off warm overhead lights. Mixing cool daylight with warm ceiling bulbs can give skin and nail colours an unnatural cast that is difficult to correct afterwards.
- Overcast days are your friend. Cloud cover acts like a giant natural soft-box, giving you soft, even light with fewer harsh highlights.
- If you shoot in the evening, use neutral or daylight-balanced light. Position your lamp so the nails are evenly lit and the skin tone still looks natural.
- Watch the reflections. Glossy nails reflect the shape and position of your light source. If a bright line or hotspot is covering nail art or hiding the true colour, slightly move the hand, phone or light until the reflection complements the nail rather than competing with it.
Find the one spot in your workspace with the best light and make it your permanent photo corner. Consistency in one spot means consistency across your whole feed.

2. Get the hand pose right
Awkward hand poses are one of the quickest ways to make an otherwise beautiful set look less polished. A few simple rules make a big difference:
- Relaxed, slightly curled fingers photograph far better than stiff, splayed ones. Think “loosely holding an invisible egg.”
- The classic poses that always work: fingers gently folded over the palm, one hand resting on the opposite wrist, or fingertips lightly touching a prop such as a polish bottle.
- Show the whole set when you can. Detail shots are useful, but potential clients also want to see how the colour or design looks across an entire hand. Make sure at least some of your photos clearly show most or all of the finished nails.
- Create a little depth. Rather than pressing the hand completely flat against the background, try raising it slightly or gently layering one hand over the other. A little separation and natural shadow can make the image feel less flat.
- Moisturise first. Dry skin and rough cuticles pull the eye away from your work. A drop of cuticle oil just before shooting adds a healthy sheen, but blot any excess or you’ll get glare.
- Wipe the nails. Dust and lint are often invisible to the eye but surprisingly obvious once you look at the photo on a screen.
3. Backgrounds: keep it boring
The nails are the star. The background’s only job is not to compete.
- Best options: a plain neutral tile, a sheet of textured card, a marble offcut, or a simple linen cloth.
- Avoid: busy towels, cluttered desks, product overload and anything with strong colours that clash with the set.
- Think about contrast. Dark nails often stand out beautifully against a lighter background, while very pale or nude shades may benefit from slightly more contrast behind them. The goal is separation, not distraction.
- Keep a small rotation. Buy or make two or three backgrounds and use them regularly. Your feed stays varied but still recognisably yours.
A background that quietly reflects your brand colours is also a subtle professional touch. Clients may not consciously notice it, but over time it helps make your work more recognisable.
4. Phone settings for sharper nail photos
- Clean your lens. Genuinely one of the most skipped steps. Your phone lives in your pocket, handbag or kit bag, so the lens is often covered in fingerprints or dust. A smudged lens means hazy photos.
- Tap to focus on the nails, then reduce the exposure slightly if the highlights are too bright. Slightly lower exposure often preserves more detail and shine, while blown-out highlights cannot easily be recovered.
- Get close rather than zooming. Moving the phone physically closer will usually give you a sharper, more detailed image. Leave yourself a little room around the hand and crop afterwards if necessary.
- Use portrait mode sparingly. It can sometimes mistake nail edges or fingertips for background and blur areas you actually want sharp. Standard photo mode with a close, steady shot is often the safer option.
- Take ten, keep one. Professionals overshoot too. Take several photos with small changes in angle, hand position and reflection, then choose the sharpest and most flattering one afterwards.
5. Edit lightly and keep the colours honest
Good nail photography should still look like the manicure your client saw in front of them.
You don’t need heavy editing. Small adjustments can improve a photo, but the aim should be to correct the image, not completely transform it.
- Adjust brightness and exposure if the image is slightly too dark or too bright.
- Correct warmth carefully if skin looks unusually yellow, orange or blue.
- Add a small amount of sharpness if needed, but don’t push it so far that skin texture or nail edges start looking unnatural.
- Avoid strong filters. Filters that significantly change skin tone or polish colour can create unrealistic expectations for clients.
- Don’t edit away the manicure. If the shade looks noticeably different on screen from how it looks in person, you’ve probably gone too far.
When doing nail photography, if you’re spending several minutes trying to rescue every photo, the better fix is usually to improve the lighting when you take the shot.
6. Frame with Instagram in mind
Since your feed is where many of these nail photos will live, frame for it from the start:
- Shoot slightly wider than you think you need. This gives you room to crop the same image for posts, Stories and Reels without cutting off fingertips or important nail detail.
- Keep the hand near the centre of the frame and avoid placing nails too close to the edges, where platform crops and profile grids may clip them.
- Give yourself cropping flexibility. One well-framed, slightly wider shot can often work as a feed post, Story or Reel cover. Shoot once, crop as needed.
7. The before-and-after formula
If you only take one type of content away from this nail photography guide, make it this one.
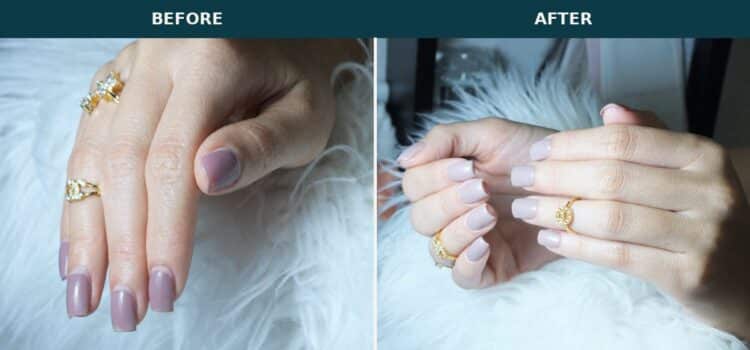
Before-and-afters are one of the most effective nail content formats because they show the transformation, and the transformation is what clients are actually buying.
The system:
- Photograph every “before” the moment the client sits down, using the same spot, angle and background.
- Photograph the “after” in exactly the same setup.
- Pair them side by side, or use them as the first and second image in a carousel post.
Matching the angle, lighting and framing between the two shots is what makes the comparison work. This is another reason your permanent photo corner matters.
8. A 15-minute weekly routine
You don’t need to become a content creator. You need a tiny, repeatable habit:
- Per client (2 minutes): take a before shot when they sit down, an after shot before they leave, and a 10-second video slowly tilting the hand so the light moves across the finish. That video clip is already the basis of a Reel or Story.
- Once a week (15 minutes): review the week’s photos, choose the best three or four, post one, and schedule the rest.
That’s it. A month of this and you’ll have a library of nail photos and videos that can keep promoting your work long after the appointment is finished.
If your books are quiet at the moment, that’s the ideal time to get this habit started — our guide to making the most of the nail tech slow season covers what else to tackle while you have the breathing room.
Quick nail photography troubleshooting
- Photos look yellow or orange: you’re probably mixing light sources. Turn off warm overhead lights and use window light or a neutral daylight-balanced lamp.
- You have a bright white line across the nail: that’s the reflection from your light source. Slightly change the hand, phone or light angle until the reflection moves away from important nail art or colour detail.
- Glitter and chrome look flat: these finishes need light movement to sparkle. Shoot a short video instead of relying only on still photos, or take several stills while slowly tilting the hand.
- Dark shades lose their depth: reduce the exposure slightly and let the natural shine highlights define the shape of the nail.
- Pale nails disappear into the background: introduce a little more contrast behind the hand rather than reaching for a heavy filter.
- Everything is slightly blurry: clean the lens, tap to focus on the nails and brace your elbows on the table when shooting.
- The photo looks good but the polish colour looks wrong: check your lighting first, then make only small colour-temperature adjustments when editing.
Final thoughts on nail photography
Great nail photography isn’t about talent. It’s a checklist: good light, a relaxed pose, a simple background, a clean lens, honest colour, controlled reflections and plenty of shots.
Run that checklist for every client and, within a few weeks, your feed will start looking more consistent, professional and intentional without needing expensive photography equipment.
Most importantly, the photos should still look like your work. Good editing and good photography should show the manicure at its best, not turn it into something the client never actually saw.
Your work already deserves better photos. Now go take them.